How to setup automatic bcc in Fastmail
Setting up automatic Bcc will allow you do save all your emails to Wobaka CRM without adding your Mailbox as Bcc every time. This guide will show you how to setup automatic Bcc in just a few steps using Fastmail.
1. Go to settings
First, in the Fastmail web application, head over to Settings > Sending identities
2. Select email address
Fastmail makes it easy to setup automatic Bcc per email addresses. This allows you to automatically Bcc Wobaka when sending from, for example your work email, but not from your personal email address. Click Edit to continue to Bcc settings for a specific email.
3. Set your auto Bcc address
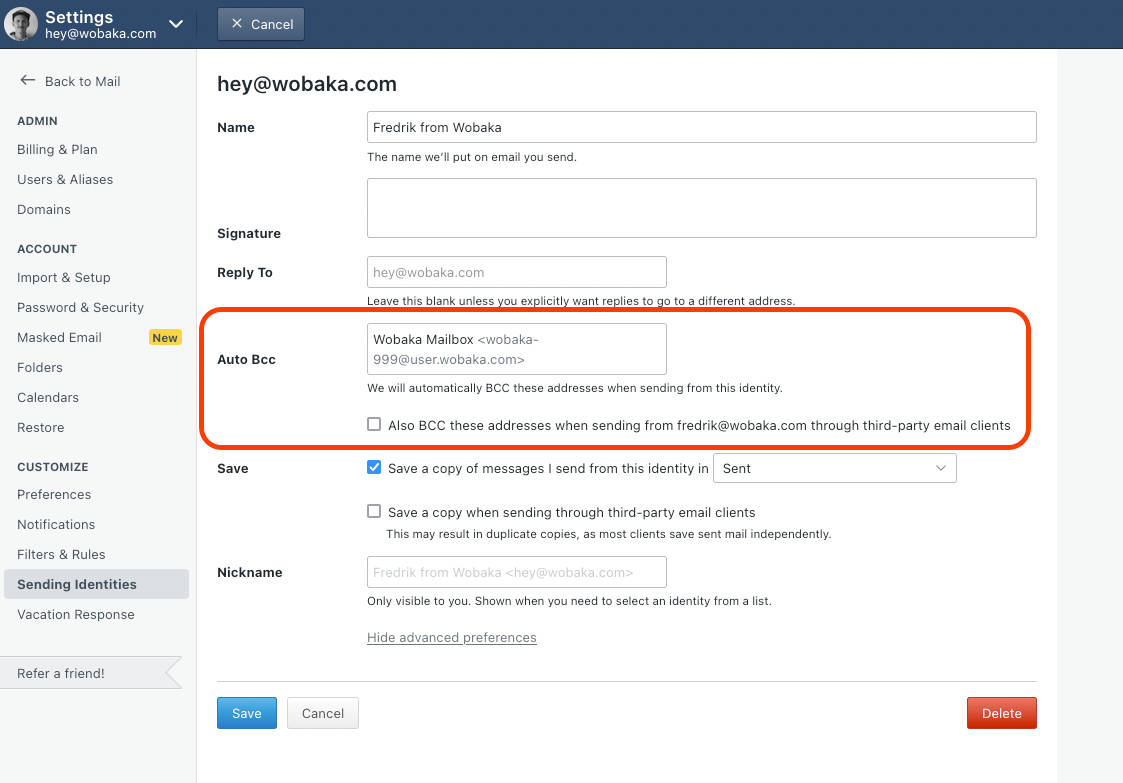
In settings, click on Show advanced preferences. Now you can add your Wobaka Mailbox as the Auto Bcc address and choose if you want to automatically Bcc this address when sending from external clients such as the Mail App on macOS as well.
Hit Save when you're done and then you're ready to send! 🥳
Need help finding your Wobaka Mailbox address? Read this 👇

You can also find Fastmail's official documentation here.
